Student Diary: Advanced Pastry Arts, Days 5 and 6
Day 5
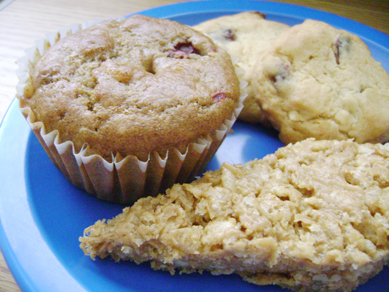
Sugar-free, gluten-free, fat-free yummies--cranberry mandarin muffins, cranberry walnut cookies, and brown rice peanut butter bars (like krispie treats, but with honey instead of marshmallow)
I'm falling behind on diary posts!
Day 5 was all about "spa treats"--stuff you'd bake for people at health spas who need gluten-free, sugar-free, dairy-free, fat-free diets, but who still want baked goods. Easy task, right? Well, it can be! Thanks to the numerous people out there who do the tedious work of finding out what combinations of what flours and whatnots combine to make healthy yumminess, there's a plethora of options out there! Granted, my chef-instructor was still hesitant to admit that these treats could ever replace the full butter/sugar/AP flour stuff (maybe rightly so), but he did manage to pull together some truly ace recipes that his resort serves at its spa. The muffins were as good as muffins can get, and the rice bars taste just about like the real thing ... even better, if you want my honest opinion! The honey it substitutes adds a warm, fruity, golden (no, not color--I mean rich and glowing) flavor. Be warned, though--if you're not into peanut butter, you won't be into these. Luckily, I'm into it. And mmm, luckily, it's also the easiest to make of the three! It's pretty close to this recipe.
We got new teams for this section, and we work together pretty well, taking on whatever tasks needed to be done. It went smoothly, and shhh--we got to go home early!
Day 6
I forgot to photograph my haul from Day 6 because it was just a handful of Kahlua truffles, some coated in chopped almonds, others in chopped walnuts, and I ate them (not all at once, but across a handful of days). We only made a handful before we had to close up shop, and there should be plenty for photographs after tomorrow's class.
We tempered a LOT of chocolate and made the beginnings of our chocolate box project and our Rigi peaks (kinda like fancy Hershey kisses). We worked in the same groups and had an awesome time again. Tempering chocolate isn't nearly as daunting now that I've done it a few times. In fact ... it's pretty stinkin' easy if you follow this method! Just slowly melt it in a double boiler, stirring and taking it off the heat as it's mostly melted. Stir to melt down the few leftover niblets that should be left (110 degrees, if you're a stickler, but not over lest you risk burning and ruining it). Then either let it cool to body temperature, or spread out two-thirds of it and work it over a marble slab or cookie sheet to cool it more quickly before adding it back to the bowl of the remaining chocolate. Once the bowl of chocolate is body temperature, it's tempered. And chocolate has to be tempered if you want it to have that snappy, shiny coating on bon bons or chocolate boxes or whatever you're working on! ;)


Comments
I never heard of brown rice peanut butter bars. It looks and sounds yummy :)
Now I really want brown rice peanut butter bars. I need more peanut butter!