Daring Bakers, August: Candylicious!
This month’s Daring Bakers Challenge was a lot of fun, but they always are!

The August 2011 Daring Bakers’ Challenge was hosted by Lisa of Parsley, Sage, Desserts and Line Drive and Mandy of What the Fruitcake?!. These two sugar mavens challenged us to make sinfully delicious candies! This was a special challenge for the Daring Bakers because the good folks at http://www.chocoley.com offered an amazing prize for the winner of the most creative and delicious candy!
I love working with chocolate and am glad I got to work with it somewhat extensively in my advanced pastry arts class during cooking school. You can see photos and read my writeup about those projects here and here.
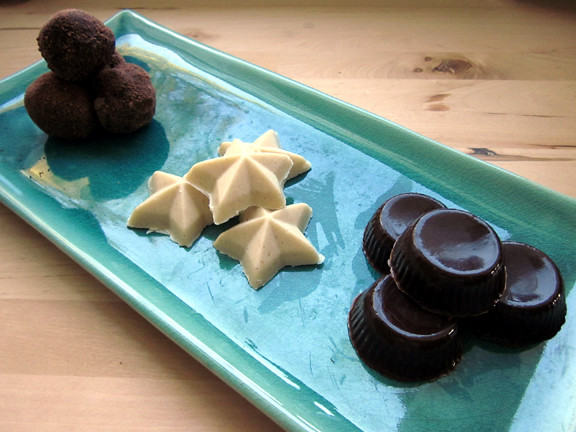
But for now, for this challenge, I made horchata chocolate using white chocolate as a base and chocolate malt ganache that I used for both rolled truffles dusted with malt powder and as a filling for molded chocolates.
Here's a bunch of eye candy. HA! Get it? Eye candy? Nevermind . . .
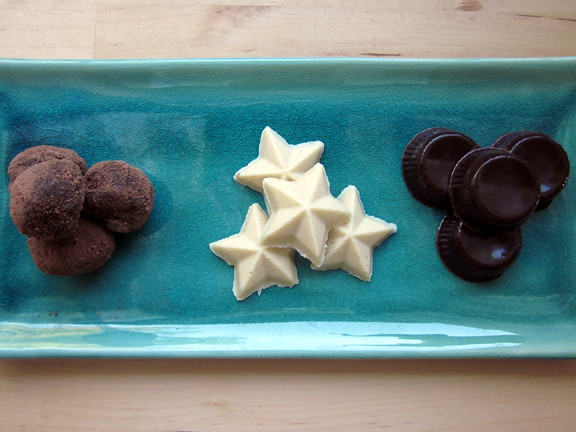
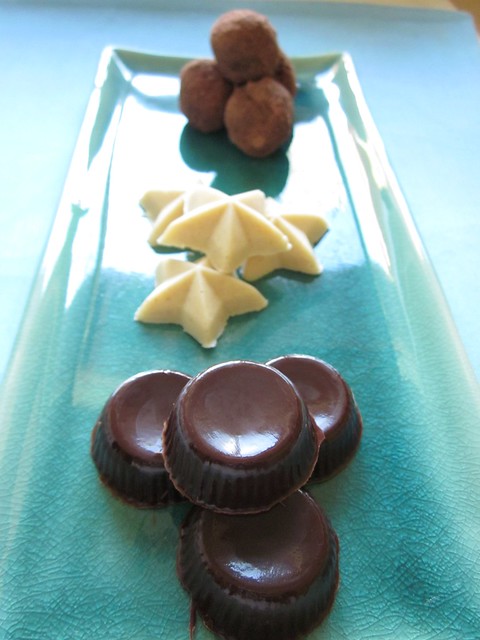
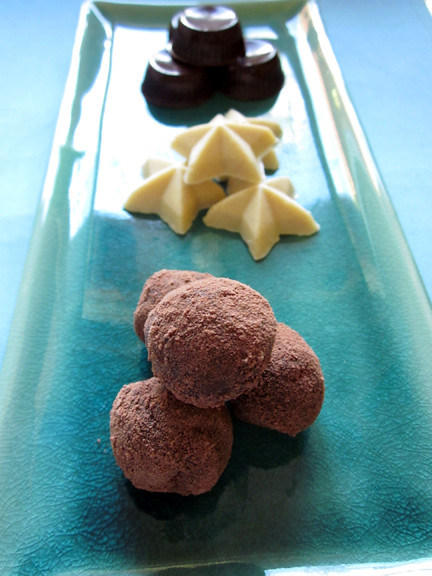
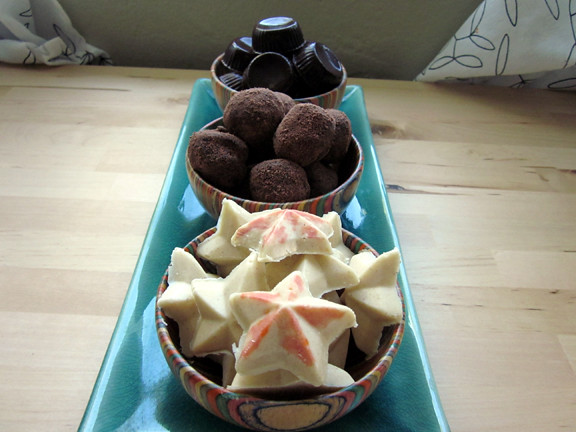
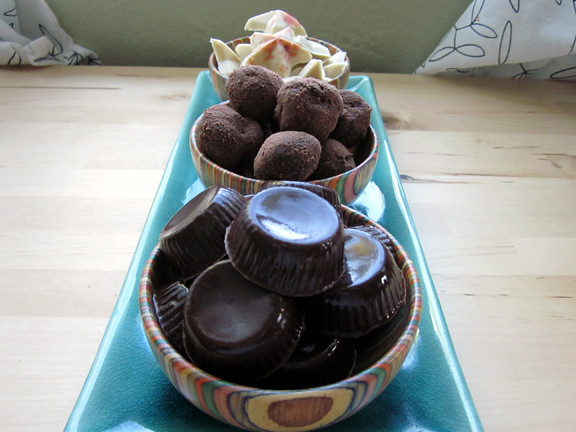
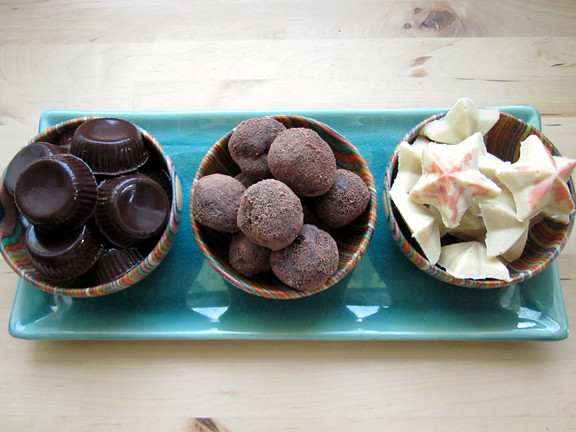
All in all, I loved how these chocolates came out--they tasted great, looked fine, and I had fun making them!
Notes:
I used Ghirardelli semisweet for the filled choclates' shell, Ghirardelli white bars (not chips--they have funky additives to keep them chip-shaped through the baking process), and Callebaut dark for the ganache.
I could go on for a long time about chocolate because it's something I was taught to work with and that I later read up a lot on on my own just because everything about chocolate is so fascinating to me. I wanted to keep these notes pertinent to this challenge, though.
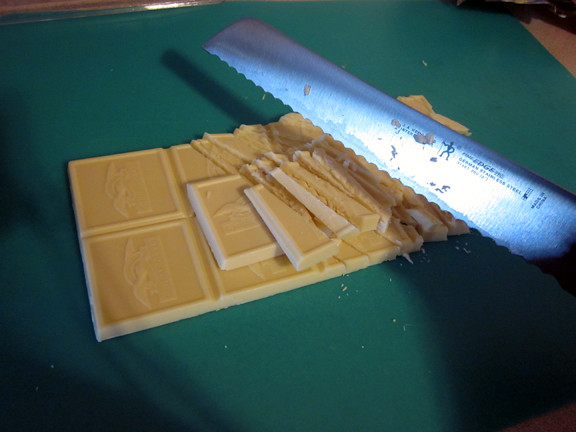
Sometimes I get lazy and just do a lazy chop of chocolate before melting it, but chopping it into teeny bits really is the best way to go for fast, uniform, efficient melting. I use my bread knife because serrated edges make such quick work of it, while flat blades just get embedded and mucked up. Working with chocolate is one of the many times I'm thankful for my flexible plastic cutting mats because I can just curve it into a slide or funnel and zip the choco pieces into my bowl (aka, the top of my double boiler).
Finely chopping white chocolate is especially important because it's such finicky stuff--it burns if you stare at it too hard, and when it gets too hot, it seizes up into a stubborn mass and then turns into a dry wad. Gross. I just bring my water (aka the 1" of water in my pot, aka the bottom of my double boiler) to a steady simmer, then gently stir my chocolate, spreading it out across the bottom of the bowl so it makes as much surface contact with the hot glass as possible, melting quickly and evenly. When I'm dealing with just a tiny bit of white chocolate, like for piping decorations, I'll melt it slowly in the microwave at about 25% power, but I keep an eye on it so it doesn't go supernova and blow my house up. Or just get black and burny.
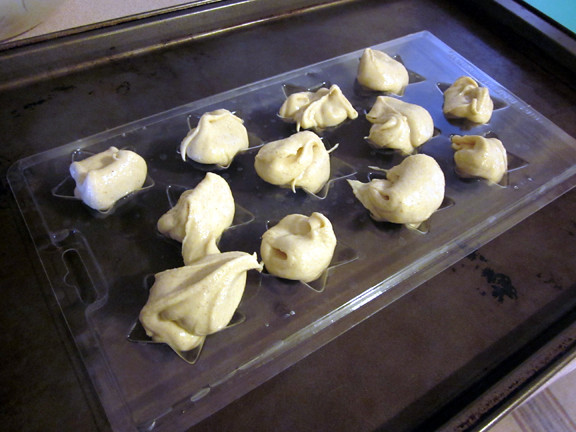
I spoon dollops into my $1.50 candy mold (available at your nearest craft store!) instead of ladling chocolate over the entire dealie bob. The mess will come in due time, but it's easier for me to work in this initial stage if I stay tidy til the bitter end.
A hard tap or three on the counter settles the chocolate into the mold. Don't be timid, but don't crazy go nuts--it's like burping the baby, and that's the other reason for the taps--to get the air bubbles out of the mold.
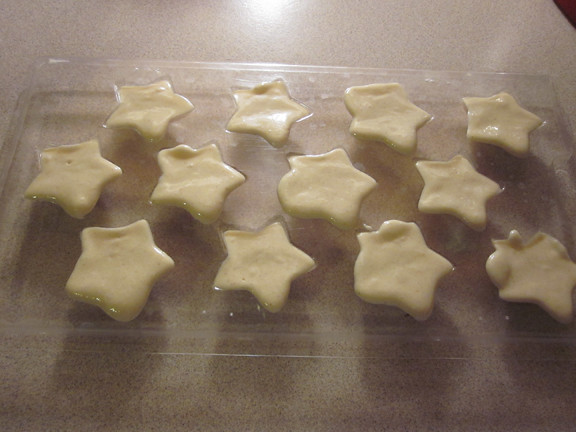
Here's the messy part--scraping the top of the mold to remove the excess chocolate. If you don't, the chocolate will probably ooze and create a "foot," and that's only cute when you're talking about macarons. Or muffin tops (but only on muffins). I use my metal bench scraper for this task because plastic ones bow a bit, and I risk either gouging up air pockets and ruining the finish (of the bottom of the chocolate that people will not likely see, I know, I know), or leave a hump of chocolate at the top (see muffin top tip above). When you scrape the craft store molds, you might trip on the staple holes--that's why it's worth taking the half a second to trim those suckers down with some cuticle scissors or some other precision snipping tool (good luck if you use scissors!).
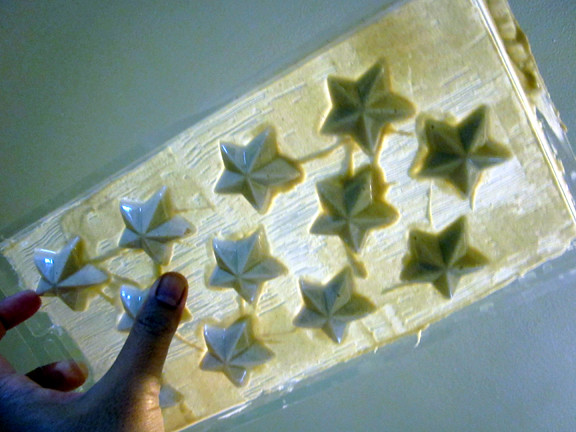
Last but not least, I check the bottom of the tray to make sure there aren't any air bubbles. If there are, I use a toothpick to shove chocolate into them. Then, it's into the fridge to set. These took less than an hour.
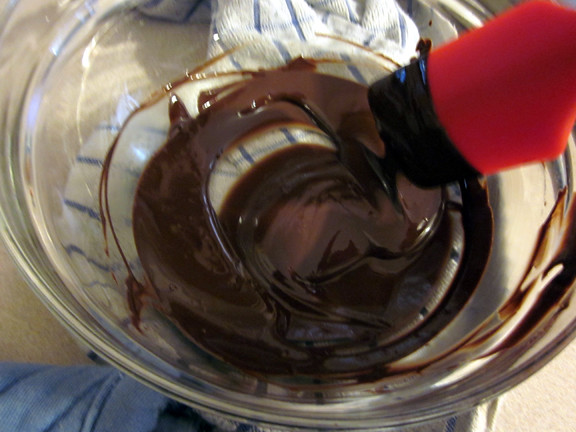
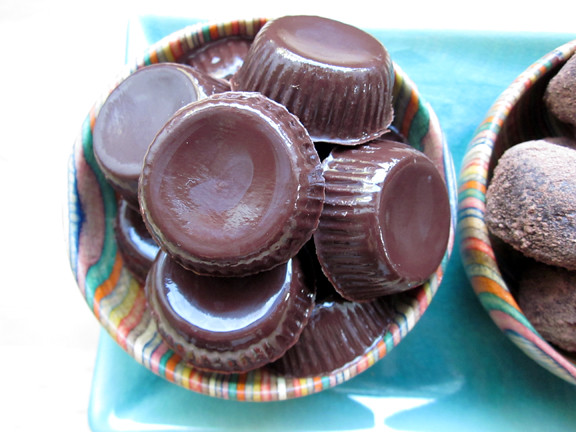
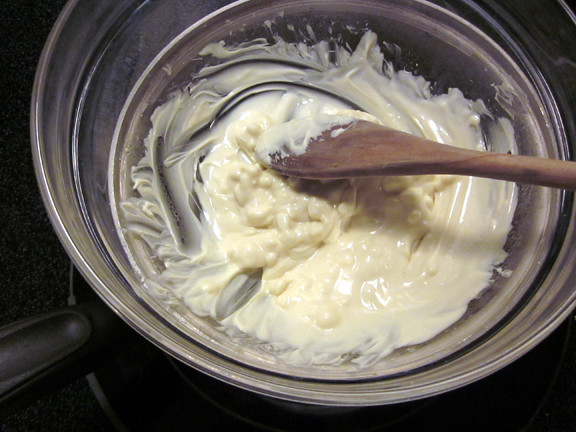
Here, I'm tempering the bittersweet chocolate to line my cup mold. I use the seeding method where I melt 2/3 of the finely chopped chocolate in the double boiler, then take it off the heat and add the remaining finely chopped third and stir it in to cool the melted chocolate down. I recommend you use a thermometer for this. I don't because I had to do it so many times in pastry class that I can tell by sight and feel if the chocolate is ready. Once the seeded chocolate is melted, I walk away and let the whole bit cool to room temperature (or stir gently to cool it a bit more quickly), then reheat it to pouring/dipping heat, which is body temperature, which means if you touch the chocolate, it shouldn't feel hot or cold. I'm not kidding--this is how I temper my chocolate. So if you had bum luck and your chocolate bloomed or never shined up because your temperatures were off, please don't hate me--I swear, it comes with practice. Just like parallel parking! Once it hits that magic temperature, it's ready for use.
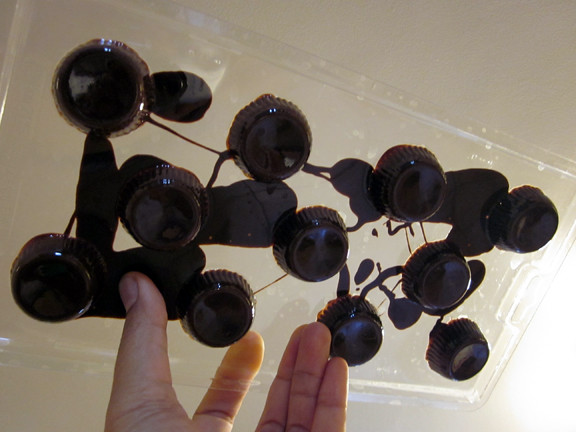
To line molds, like for bonbons or cups, I either use a paint brush and brush several coats up the sides of the shape, or I pour enough to coat, turn the whole thing upside down over a baking sheet, and give it a firm tap or three to knock out as much excess chocolate as possible. If it's too thin, you risk breaking your coating while removing it from the mold. If it's too thick, you have no room for filling, and that's sad. Especially if it's peanut butter. =( Set the mold in the fridge to set for about 15 minutes.
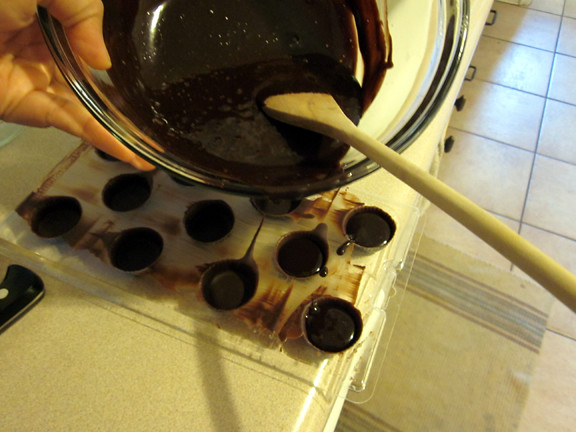
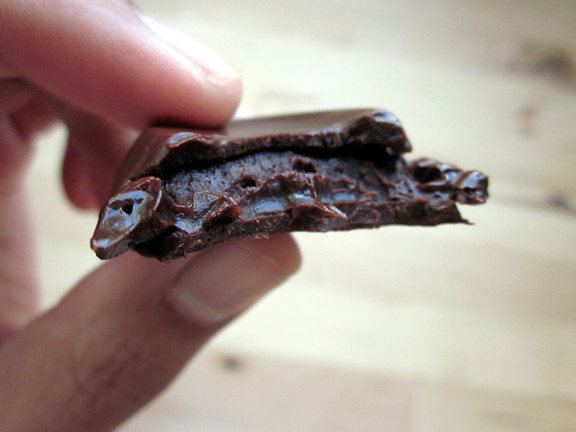
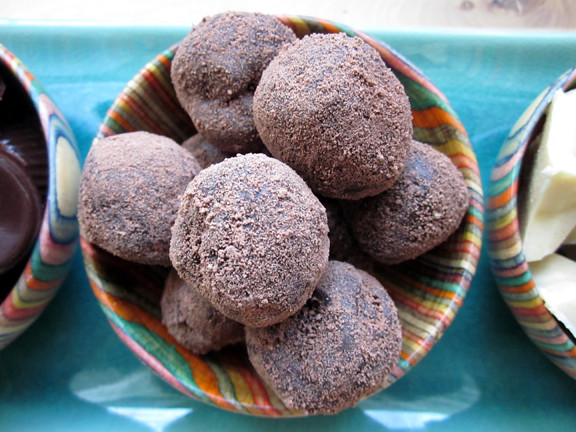
Then I filled the shell with some blessedly simple ganache flavored with malt powder. My ganache (aka truffle goo) is pretty simple. By weight, I use 1 part boiling cream to 2 parts chocolate. I use a splash more as the cocoa content rises. Unless I'm using a flavor that needs to steep in the cream, like vanilla beans (not extracts--don't ever steep extracts because they lose potency in the direct heat) or teas/heat-activated spices, then I mix my add-ins/flavoring into the prepared ganache. For the filled chocolates, I poured the cooled (but not stiff) ganache into the shells, then set it in the fridge for about an hour to set. The remainder of the ganache I left in the bowl and threw the whole thing in the fridge to firm up so I could scoop them into portions with a melon baller, let those shapes set in the fridge for a bit, roll them into rounder balls by hand (if desired), and coat them with malt powder.
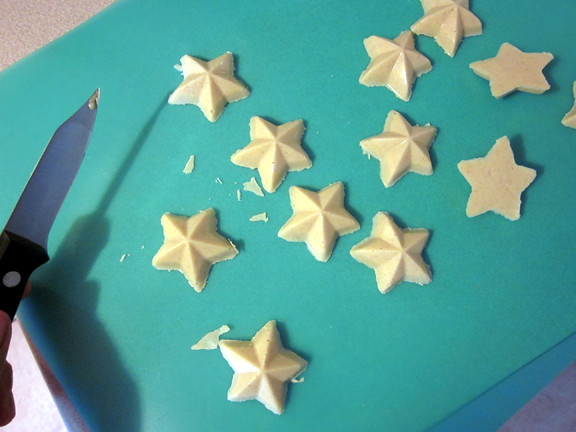
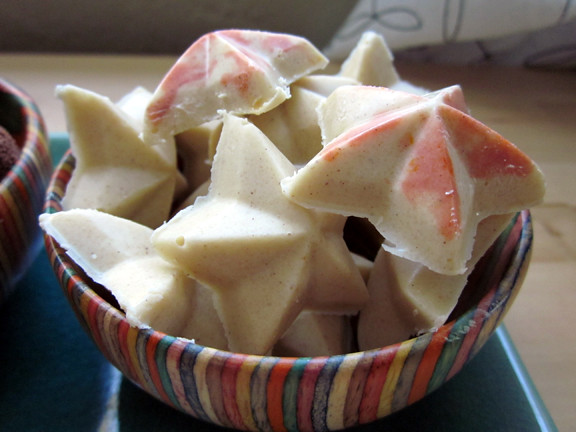
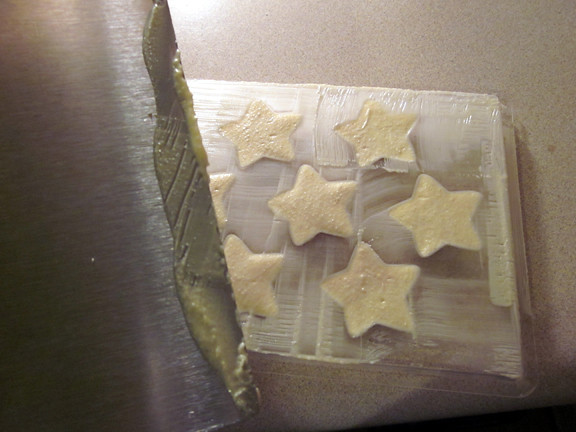
My first tray of stars had some "feet," so I made quick work of them with my utility knife.
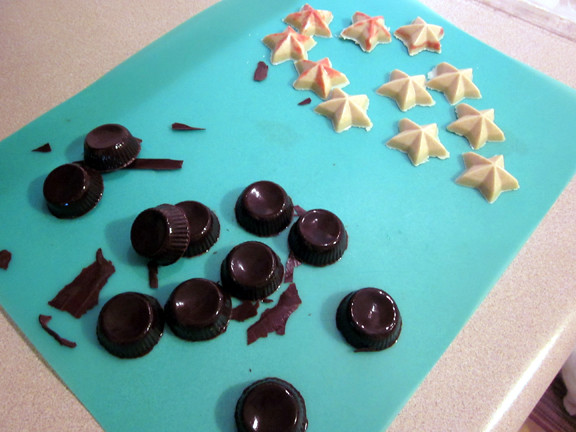
Yay! Shiny, and the dark chocolate shell had a beautiful snap to it--those are the points of tempering chocolate--shine and snap!
I stored my chocolates in the fridge, uncovered. In theory, you don't want to do that, since you risk blooming the chocolate in cool weather, but I had a greater risk of blooming the chocolate in the heatwave of my house/kitchen/world, and it held up just fine in the fridge with no bloom and no condensation (fridges are actually pretty reliable dehydrators unless you put something in an enclosed container (e.g., a sealed produce bag), in which case, it's sweat city. All the chocolates I serve at room temperature, though I sometimes just leave the white chocolate in because it gets a bit slippy around 80 degrees, which is a bummer since that's just a couple degrees up from our house temp. Ah well.
Check out the fantastic candy my fellow DBers made this month by stalking them through our blogroll.
The August 2011 Daring Bakers’ Challenge was hosted by Lisa of Parsley, Sage, Desserts and Line Drive and Mandy of What the Fruitcake?!. These two sugar mavens challenged us to make sinfully delicious candies! This was a special challenge for the Daring Bakers because the good folks at http://www.chocoley.com offered an amazing prize for the winner of the most creative and delicious candy!
I love working with chocolate and am glad I got to work with it somewhat extensively in my advanced pastry arts class during cooking school. You can see photos and read my writeup about those projects here and here.
But for now, for this challenge, I made horchata chocolate using white chocolate as a base and chocolate malt ganache that I used for both rolled truffles dusted with malt powder and as a filling for molded chocolates.
Here's a bunch of eye candy. HA! Get it? Eye candy? Nevermind . . .
All in all, I loved how these chocolates came out--they tasted great, looked fine, and I had fun making them!
Notes:
I used Ghirardelli semisweet for the filled choclates' shell, Ghirardelli white bars (not chips--they have funky additives to keep them chip-shaped through the baking process), and Callebaut dark for the ganache.
I could go on for a long time about chocolate because it's something I was taught to work with and that I later read up a lot on on my own just because everything about chocolate is so fascinating to me. I wanted to keep these notes pertinent to this challenge, though.
Sometimes I get lazy and just do a lazy chop of chocolate before melting it, but chopping it into teeny bits really is the best way to go for fast, uniform, efficient melting. I use my bread knife because serrated edges make such quick work of it, while flat blades just get embedded and mucked up. Working with chocolate is one of the many times I'm thankful for my flexible plastic cutting mats because I can just curve it into a slide or funnel and zip the choco pieces into my bowl (aka, the top of my double boiler).
Finely chopping white chocolate is especially important because it's such finicky stuff--it burns if you stare at it too hard, and when it gets too hot, it seizes up into a stubborn mass and then turns into a dry wad. Gross. I just bring my water (aka the 1" of water in my pot, aka the bottom of my double boiler) to a steady simmer, then gently stir my chocolate, spreading it out across the bottom of the bowl so it makes as much surface contact with the hot glass as possible, melting quickly and evenly. When I'm dealing with just a tiny bit of white chocolate, like for piping decorations, I'll melt it slowly in the microwave at about 25% power, but I keep an eye on it so it doesn't go supernova and blow my house up. Or just get black and burny.
I spoon dollops into my $1.50 candy mold (available at your nearest craft store!) instead of ladling chocolate over the entire dealie bob. The mess will come in due time, but it's easier for me to work in this initial stage if I stay tidy til the bitter end.
A hard tap or three on the counter settles the chocolate into the mold. Don't be timid, but don't crazy go nuts--it's like burping the baby, and that's the other reason for the taps--to get the air bubbles out of the mold.
Here's the messy part--scraping the top of the mold to remove the excess chocolate. If you don't, the chocolate will probably ooze and create a "foot," and that's only cute when you're talking about macarons. Or muffin tops (but only on muffins). I use my metal bench scraper for this task because plastic ones bow a bit, and I risk either gouging up air pockets and ruining the finish (of the bottom of the chocolate that people will not likely see, I know, I know), or leave a hump of chocolate at the top (see muffin top tip above). When you scrape the craft store molds, you might trip on the staple holes--that's why it's worth taking the half a second to trim those suckers down with some cuticle scissors or some other precision snipping tool (good luck if you use scissors!).
Last but not least, I check the bottom of the tray to make sure there aren't any air bubbles. If there are, I use a toothpick to shove chocolate into them. Then, it's into the fridge to set. These took less than an hour.
Here, I'm tempering the bittersweet chocolate to line my cup mold. I use the seeding method where I melt 2/3 of the finely chopped chocolate in the double boiler, then take it off the heat and add the remaining finely chopped third and stir it in to cool the melted chocolate down. I recommend you use a thermometer for this. I don't because I had to do it so many times in pastry class that I can tell by sight and feel if the chocolate is ready. Once the seeded chocolate is melted, I walk away and let the whole bit cool to room temperature (or stir gently to cool it a bit more quickly), then reheat it to pouring/dipping heat, which is body temperature, which means if you touch the chocolate, it shouldn't feel hot or cold. I'm not kidding--this is how I temper my chocolate. So if you had bum luck and your chocolate bloomed or never shined up because your temperatures were off, please don't hate me--I swear, it comes with practice. Just like parallel parking! Once it hits that magic temperature, it's ready for use.
To line molds, like for bonbons or cups, I either use a paint brush and brush several coats up the sides of the shape, or I pour enough to coat, turn the whole thing upside down over a baking sheet, and give it a firm tap or three to knock out as much excess chocolate as possible. If it's too thin, you risk breaking your coating while removing it from the mold. If it's too thick, you have no room for filling, and that's sad. Especially if it's peanut butter. =( Set the mold in the fridge to set for about 15 minutes.
Then I filled the shell with some blessedly simple ganache flavored with malt powder. My ganache (aka truffle goo) is pretty simple. By weight, I use 1 part boiling cream to 2 parts chocolate. I use a splash more as the cocoa content rises. Unless I'm using a flavor that needs to steep in the cream, like vanilla beans (not extracts--don't ever steep extracts because they lose potency in the direct heat) or teas/heat-activated spices, then I mix my add-ins/flavoring into the prepared ganache. For the filled chocolates, I poured the cooled (but not stiff) ganache into the shells, then set it in the fridge for about an hour to set. The remainder of the ganache I left in the bowl and threw the whole thing in the fridge to firm up so I could scoop them into portions with a melon baller, let those shapes set in the fridge for a bit, roll them into rounder balls by hand (if desired), and coat them with malt powder.
My first tray of stars had some "feet," so I made quick work of them with my utility knife.
Yay! Shiny, and the dark chocolate shell had a beautiful snap to it--those are the points of tempering chocolate--shine and snap!
I stored my chocolates in the fridge, uncovered. In theory, you don't want to do that, since you risk blooming the chocolate in cool weather, but I had a greater risk of blooming the chocolate in the heatwave of my house/kitchen/world, and it held up just fine in the fridge with no bloom and no condensation (fridges are actually pretty reliable dehydrators unless you put something in an enclosed container (e.g., a sealed produce bag), in which case, it's sweat city. All the chocolates I serve at room temperature, though I sometimes just leave the white chocolate in because it gets a bit slippy around 80 degrees, which is a bummer since that's just a couple degrees up from our house temp. Ah well.
Check out the fantastic candy my fellow DBers made this month by stalking them through our blogroll.


Comments
Rajani
Thanks for taking part in the challenge :)